The basics – Manual mode function and application
“Where there is a will there is a way ” this is one of my most favourite pronoun. It gives me power when i am in doubtful situations and questions arising how to do? what to do? can i do this? whom to ask? the answer is simple, go crazy on your interests this universe has everything to satisfy your needs. Photography is one of my priority interest which gives me ultimate satisfaction after seeing the beauty of God’s creation in the form of my photos. But i feel i have to improve a lot so i am in the world of learning photography. Knowledge is infinite and your quest for it must be uninterrupted. Here are some tips or in official language, some tutorials regarding a good photography. This can be just a platform you can go for further advancement in your knowledge through other references. I am a simple person so i want my tutorials also to be so simple :
Miracle Triangle – Aperture, Shutter- Speed and ISO.
About the Stunning Aperture
Aperture is inversely proportional to the light. The more the aperture the lesser the light entry. Camera lens with focal length 1.4 and 50mm can be the best for a perfect photography, you can check this link for details http://www.ebay.in/itm/like/171315464814?aff_source=Sok-Goog
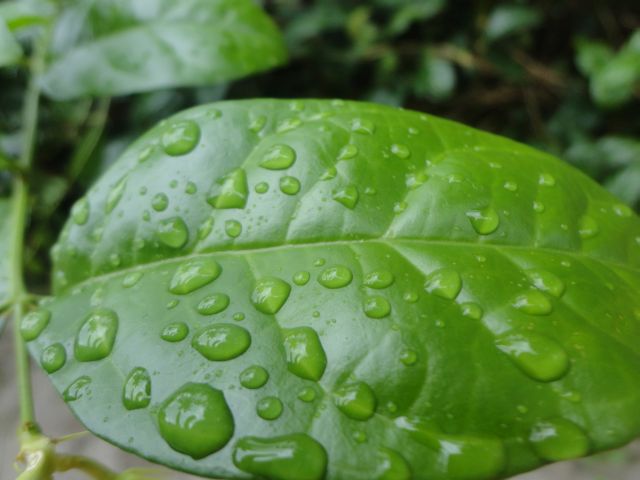
The wider the aperture the wider the background coverage. Suppose if you wanna take picture of a flower then u can set the focus fit to the flower so that you will get a picture of focused flower with blurry background. so increasing the focal length decreases the non-blurriness of the background. Did you understood??? i think u get clarity once you view the image below :
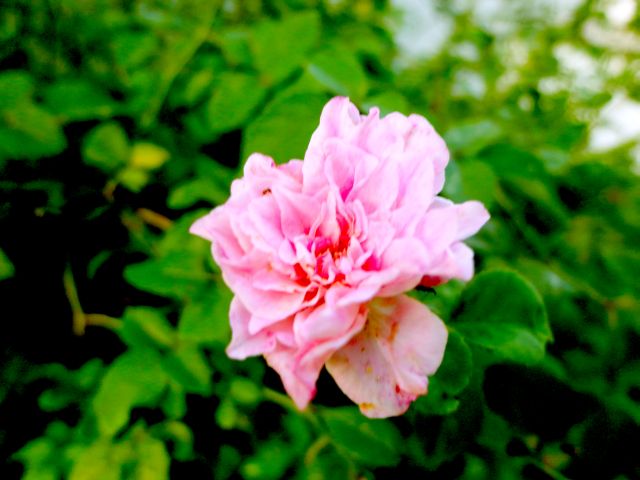
In this picture, the flower is my focus so the leaves surrounding the flower is blurred showing the flower in focus. Like this you can adjust your aperture settings to make the object you wanna focus. Next we move on to ISO.
2. The Alien ISO
ISO as the name suggests has no relation with the photography, it is the acronym of International Organization for Standardization. But it has so major roles in taking nice photography, lets see that. ISO is directly proportional to the light. The more the ISO the more the light entry and vice versa. ISO allows more light to enter making your picture ultra clarified. Normally the ISO is set at 800 for good photographs you can increase or decrease it according to the light available. If you have plenty of sunlight then you can take photos with lower ISO , increasing it will create spots in your photos which look dirty. But if you are indoor you can set up-to 6400 to shoot nice photos. 
3. The wizard – Shutter Speed

Shutter speed is a magic wand to set your images blur free. I was fed up by positioning my niece steady for non-blurry photography but she still moves and make my photos blurry. After getting to know about this magic wand my problem has settled. Shutter speed is inversely proportional to blurriness. The slower the shutter speed the more sharper your image will be. So play with your Shutter Speed settings, set it to 1/125 to get crispy images. Now shoot the movements of greenish paddy field blown by the natural freezy wind or tell your kids to play or run and shoot with ease.
This is such an amazing idea! You’ve been inspiring me for days! All i want to do all day is just to see and admire the way you dress.
may i know u